Create Your Own Top: A Step-by-Step Guide to Custom Apparel
Creating your own custom top is more accessible than ever. Whether you want something for yourself, a gift, or a group — here's exactly how to go from idea to finished garment.
Step 1: Decide what the shirt is for
The purpose of the shirt shapes every decision that follows. A gift for a pet lover, a team shirt for a family reunion, a personal shirt with your own art, a statement piece for a cause — each calls for different design choices, garment types, and ordering quantities.
Before you start designing, answer these:
- Is this for one person or a group?
- Is there a specific occasion or is it for general wear?
- What's the vibe — fun and casual, bold and graphic, something sentimental?
- Does it need to match other shirts, or is it standalone?
Clear answers make every subsequent decision easier.
Step 2: Build your concept
A shirt concept has two components: the subject (what the design depicts) and the style (how it's rendered). Getting both right is what separates a shirt people actually wear from one that sits in a drawer.
Choosing a subject
The best shirt subjects are things with personal significance or strong visual identity. Popular choices:
- Pets — especially with distinctive features or expressions
- Portraits — a person who means something to the recipient
- Places — a meaningful location, skyline, or landscape
- Moments — a group photo transformed into graphic art
- Interests — a hobby, passion, or inside reference
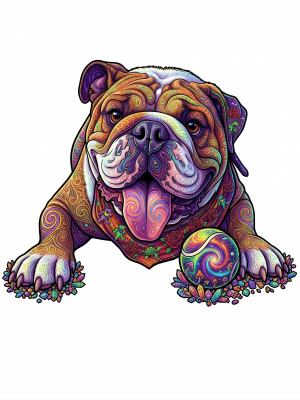
Choosing a style
Style is how the subject is rendered. The best shirt styles share common traits: high contrast, flat or limited color, clean edges, strong silhouette. Styles that work consistently:
- Line art — ink drawing, no fill, timeless
- Pop art — bold, flat, graphic, high impact
- Vintage badge — compositional, complete-feeling, classic
- Woodcut — raw, hand-crafted look, black and white
- Psychedelic — color-forward, retro, expressive
Step 3: Create your design
You have three options for getting a design, each suited to different situations:
Option A: AI design (fastest, no skills needed)
Upload a photo to an AI design tool like MadeFromArt. The AI transforms your photo into print-ready artwork in the style you choose. Takes 2–5 minutes. Best for photo-based designs — pets, portraits, places.
Option B: Hire an illustrator (most control, highest cost)
Commission a designer on Fiverr, 99designs, or through a personal contact. You get exactly what you brief them to create, but it costs $50–$500 and takes days to weeks. Best for complex, precise illustrations or brand-level designs.
Option C: Design it yourself
Canva, Adobe Express, and similar tools offer templates. Good for text-heavy or logo-based designs. Not ideal for photo-based custom art unless you have real design skills.
Step 4: Choose your garment
The garment choice affects the feel, fit, and how the design looks in person. Key decisions:
Fabric and weight
Ring-spun cotton (what Bella+Canvas and Next Level use) is softer and has a more retail-quality feel. Standard cotton (Gildan 5000) is more affordable, durable, and has a slightly stiffer hand. Both print well.
Fit
Unisex shirts (like Bella+Canvas 3001) run slightly slim. Women's fitted tees run smaller still. If you're unsure, order unisex and size up one. Check the size chart — it varies by brand.
Color
The shirt color is part of the design. White shows the full color range of your design. Black or dark shirts require white underbase for DTG printing, which slightly affects colors. Consider the contrast between your design colors and the shirt color before committing.
Style
Classic crew neck is the safest and most versatile. V-neck, long sleeve, hoodie, and tank are also available depending on the platform you use. The design placement may need adjustment for non-standard styles.
Step 5: Place your order
Once you have your design and garment choice, ordering is straightforward. Use a platform that supports single-shirt orders if you're not buying in bulk. Key things to confirm before clicking "order":
- Design preview. Check the mockup carefully. Look at placement (not too high, not too low), design size relative to the shirt, and color contrast.
- Size. Custom shirts can't typically be exchanged. Triple-check the size chart.
- Shipping address. Especially important for gifts.
- Production timeline. Understand when the shirt will actually ship. "Shipping time" and "production time" are separate.
Step 6: Care for your custom top
DTG-printed custom tops last longer with proper care:
- Turn inside out before washing
- Cold water wash, gentle cycle
- Air dry or tumble dry on low
- Don't iron directly on the print
- Don't use bleach or strong chemical detergents
A well-cared-for DTG print holds up for years of regular wearing and washing.
Create your custom top right now
MadeFromArt walks you through every step: upload your photo, AI creates the design, you pick your garment and order. No design skills, no minimums. Two free designs to start — no account required.
Start Designing Free